Odoo is an ERP (Enterprise Resource Planning) management software written in Python, previously known as OpenERP.
Odoo offers Startups and SMEs a single suite of applications, which can be used on the Cloud to manage all the commercial activities, ranging from accounting, warehouse and sales management, to human resources, marketing and project management, and develop their business.
In this tutorial you will see how to install the open source Community version of Odoo 12 on your Ubuntu 20.04 server, the Wkhtmltopdf tool for printing PDFs, and how to configure its first start.
To get started, connect to your server via an SSH connection. If you haven’t done so yet, following our guide is recommended to connect securely with the SSH protocol. In case of a local server, go to the next step and open the terminal of your server.
Installing Odoo 12 through repository
Before proceeding with the installation of Odoo, install the necessary database to hold the data.
Then, proceed with the installation of PostegreSQL:
$ sudo apt-get install postgresql -y
Once completed, install the Odoo repositories and proceed with its installation:
$ wget -O - https://nightly.odoo.com/odoo.key | apt-key add -
$ echo "deb http://nightly.odoo.com/12.0/nightly/deb/ ./" >> /etc/apt/sources.list.d/odoo.list
$ apt-get install odoo -y
Installing wkhtmltopdf
Wkhtmltopdf is an optional software that allows Odoo to generate prints in PDF format.
Although it is not an essential requirement for the correct functioning of Odoo, installing it is recommended, because sooner or later it will certainly be necessary to print, as in the case of invoices to be printed.
Then, proceed by downloading the package for Debian / Ubuntu 64 bit:
$ sudo wget https://builds.wkhtmltopdf.org/0.12.1.3/wkhtmltox_0.12.1.3-1~bionic_amd64.deb
At this point, use dpkg and apt-get to install it:
$ sudo dpkg -i wkhtmltox_0.12.1.3-1~bionic_amd64.deb
$ sudo apt-get install -f -y
Once the installation is completed, add a link to its executable in the "bin" system directory:
$ sudo ln -s /usr/local/bin/wkhtmltopdf /usr/bin
$ sudo ln -s /usr/local/bin/wkhtmltoimage /usr/bin
Finally, restart the Odoo service:
$ sudo /etc/init.d/odoo restart
Configuring Odoo ERP
To complete the Odoo configuration, proceed using a browser of your choice and visit the URL of your server, specifying port 8069:
http://SERVER_IP:8069/
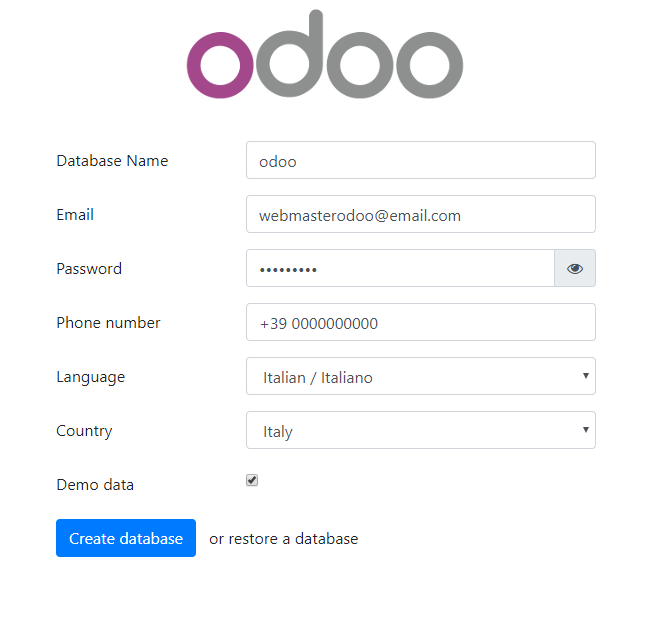
If the installation was successful, the following screen will be shown:

Enter the data indicated above, specifying the name of the database and changing the email, the password of the administrator user and the telephone number.
If you wish, insert sample data by clicking on the "Demo data" checkbox.
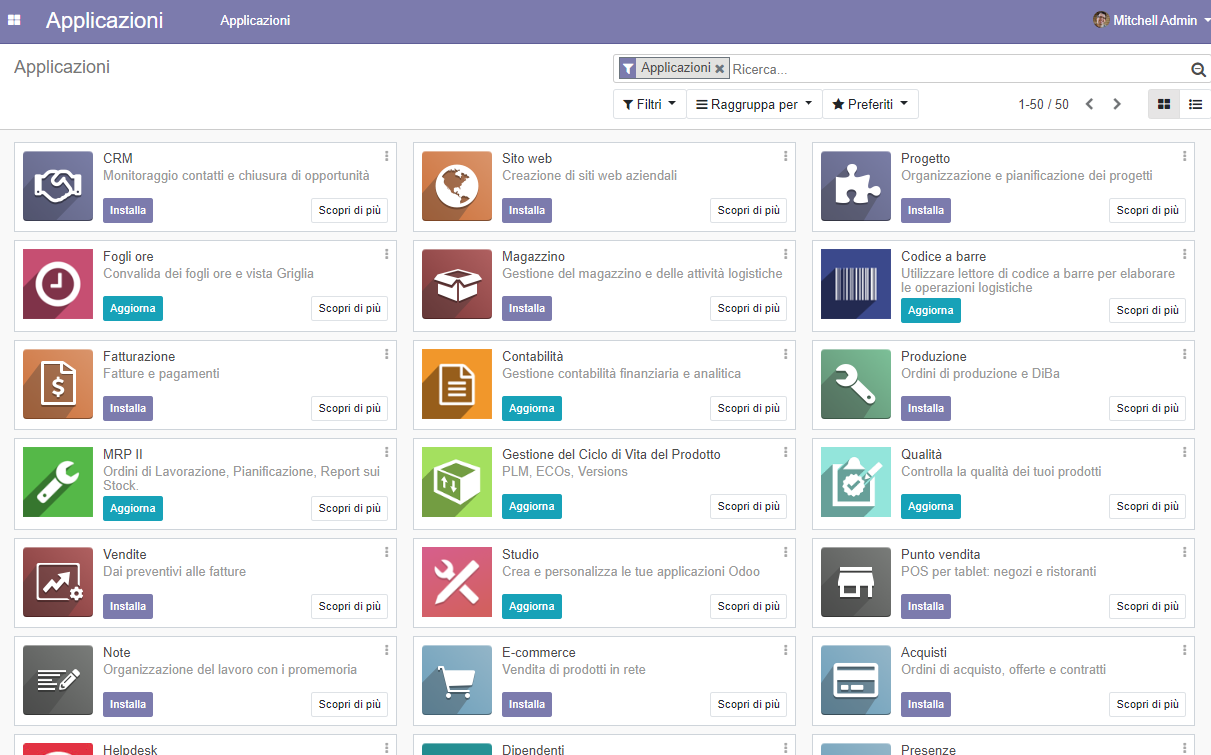
Then, click on the "Create database" button: the procedure to complete the installation will start. Once finished, Odoo is functional and ready to install the first modules you want to use:

As you can see, some Modules are installed by default: in this case, the sole option is to update them. To install a new application instead, just click on the "Install" button and follow the installation procedure.